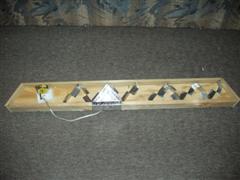
Pixel row test setup
Over the last week (and mainly just today), I've been trying out some methods of creating the internal divisions between the pixels in a given row. I already built a single 15-pixel row earlier to start things off, so I've been using that as my test vehicle.
I bought some flashing from Home Depot to do the separators (as I stated in the previous post) and cut a 2' strip. I then cut it in thirds lengthwise, giving me 3 pieces 2' by slightly less than 2".
I screwed up the first piece pretty early, as expected, and then actually thought ahead about how to cut the 2nd strip before actually cutting it.
The second strip worked out well, except I couldn't measure correctly and ended up with a zig-zag piece in which every straight length was 1/4" too short. I also had a hard time actually attaching the metal to the plywood. The nails (carpet tacks, actually) I bought are absolutely tiny and the only way I could pound them in is by using a needlenose pliars to hold them. The hammer head barely fit into the box and I kept hitting the flashing with it too. And on top of all of that, the plywood just absorbed all of the force of the hammer because it was being suspended by the walls.
The 3rd strip actually worked out well. The 2' piece I had cut ended up being about 2" too short for what I needed, but that was fine as I really didn't need to test a whole 5 pixels or anything. I used a 1/16" drill bit and pre-drilled into the flashing and a small amount into the plywood to use as a pilot hole. Then I used a (very) small amount of wood glue on each carpet tack and just pushed it in with a pliars instead of with the hammer. This worked considerably better than my first approach. I need to pick up a punch though, because the pliars can only push so hard and I need to get the nail/tack more flush than it currently is.
I just used my LED tester to wire up RGB LED's, mainly because it was a lot easier than any other method. The red was overpowering the green and blue so much (with all 3 at 10mA) that I dropped the red down to 5mA. This worked out surprisingly well.
I also experimented with the 1" border between each of the pixels, just to make sure that everything still jibed with my earlier design work. I used black duct tape (I couldn't find my electrical tape) and lined everything up properly. I think it looks pretty decent.
Here are some pictures of the whole thing:
Test pixel row, with 1 pixel lit up white:

The guts of the row, with the pixel on still:

3 of the pixels, close up, with carpet tacks visible:

Pixel mask with 1" borders (the only border that is 1" is the common section between the two; Using an incandescent lightbulb for backlighting):

Labels: Construction, Supplies
0 Comments:
Post a Comment
Links to this post:
Create a Link
<< Home