Jurek and the Amazing Techno, Colored DreamWall

Jurek and the Amazing Techno, Colored DreamWall

The title is mostly a placeholder, as I haven't really figured out a name for it yet. This project is a wall hanging that consists of semi-large triangular pixels using discrete RGB LED's and PWM to control intensity levels of each LED, resulting in a 4096-color display.

Thursday, November 30, 2006

Post-opening Update

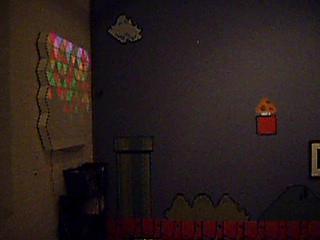
The art show opening went really well. There were a ton of people there, and from what friends have told me, many, many people was awed by the wall. The visible damage along the top of the wall was out of eyesight (being ~9' high), so no problems there.

I will be talking with the landlord of the Q'arma Building tonight about possibly renting a small studio space. He has a few smaller (320 and 290 sq. ft.) studios that are relatively affordable, so I am going to be exploring this option for working on the wall. My current apartment isn't suitable at all for the work I need to do (cutting wood, etc), so this will hopefully work. The studios are in the basement and don't look pretty, but just need a work area, nothing more.

As you may have noticed, things have slowed down a bit. Relaxing at the end of a day is a welcome luxury after the last 2 months.

I have briefly started looking into the USB interface, and boy is that going to suck. I've found a book or two addressing the issues of USB interfaces to project devices (exactly what I have), so I will probably pick one or more of them up. It's a very complex communication method, especially since I have to write both sides. We'll see how that goes :|

Labels:

Friday, November 17, 2006

Show opens tonight!

Just a quick post here. The Level_13: Bonus Round show opens up tonight at 6:00pm. It will probably run until at least midnight, for those planning their evening.

The address is (in the Q'arma building):
1224 Quincy St. NE
Minneapolis, MN 55413

google maps
yahoo maps
new yahoo maps
mapquest

email me or call me if you need better directions or get lost.

Labels:

Show Update

Recovery
I took all of today (Thursday) off from work just so I'd have enough time to finish fixing the wall. It took me, in total, about 6 hours to completely do everything.
I tried using some superglue to fix the mashed wall section, but I doubt it did any good. The "wood product" used in this area is so porous, that the super glue just kinda soaks in and disappears. I taped it together for a while to let the glue set, and then just covered it all up with more aluminum tape. The final step was painting the outside. It took quite a bit of paint (relatively speaking), because like I said before, the wood is very porous without the hard markerboard surface, that it just soaked up much of the paint. In the end, the area was cleaned up pretty well. I felt like a plastic surgeon from the 1940's for war injuries. Just fix it up enough to function.
The acrylic was fairly easy to cut. 2 scores to get it to the "rough" rectangular shape, and then another 6 triangular wedges, with 8 scores, and the whole piece was completely cut.
The contact paper was pretty annoying, and I think it looks horrible close-up without the lights on, but you really can't see anything bad when it's 5 feet away and/or the lights are on. I didn't really have a whole lot of time to deal with trying to get it to look perfect, so I had to just leave it as it is.
I drilled 8 holes, 2 per piece of wood, for securing the mounting blocks to the wall, and used 1 1/2" #8 bolts to secure them to the wall. Hopefully, with those and the Liquid Nailz, it shouldn't come loose again.
The velcro took the bear's share of the time, at probably about 4-4.5 hours. It's a very tedious operation. Oh well, such is the way of things.
I then used 1" screws (instead of 3/4") to secure the mounting hardware to the wall, so that it actually goes into both pieces of wood.

After making all of the updates, I made the tricky decision of hanging it back up where it was before. I would be very, very surprised if the mounting brackets gave way again.

I took a small video of the wall in its mounting place for the art show. Here ya be (2.24MB QuickTime):


At this point, about all I can do is hope for the best. I will be at the opening tomorrow from maybe 6:30 or so until who knows how late.

That is all, signing off.

Labels: ,

Wednesday, November 15, 2006

Tragedy falls

It is with great pain and angst that I must tell you all that a certain tragedy has befallen the wall this evening.

After getting the wall hung (the top of it about 7' high) at the art gallery, I breathed a rather large sigh of relief. I helped with several other tasks, like hanging other pieces and moving some remaining boxes and materials from the old space to the new one.

At about 10pm, as I was on the computer picking some music to play, I heard a noise... a tear perhaps? a crash? I'm not entirely sure. I looked over in enough time to see the wall falling down onto the bookshelf below it, tilt forward, fall top-first onto the coffee table next to the bookcase, and finally land on the floor.
I immediately assumed the worst--that the wall was in several pieces and a complete loss. As I got over to it (covering 40 feet in the span of about 3 seconds), I noticed in my horror that all of the processor was still churning and the LEDs still seemed to be working. At least now I know that the boards can withstand a modest physical shock.

After surveying the aftermath of destruction, these are the casualties:
  • Disconnected mounting pieces of wood on the back of the wall. This is what failed. On the back, for mounting the wood, I used liquid nailz and glued together 2 1/2"-thick pieces of wood, and used 4 of these as mount points for hanging. Only 2 of these were used, and only 1 of them failed. We only used 3/4" screws, which never penetrated past the first piece of wood into the second. I don't know if the integrity of the other joint would have been comprimised at some point, either, if I would have used 1" screws.
  • Shattered top acrylic piece. It was completely destroyed, shattered almost all the way through vertically. Some or most of the velcro may be salvagable, however.
  • Top, middle pixel exterior wall collapsed. It's not entirely destroyed, but the marker board is "mushy" and severely cracked on the outside. Some tape, superglue, and paint should be able to fix it up well enough for Friday.
  • Broken top shelf on the bookcase. This is what took the initial blow and I think the main thing that saved the wall from being absolutely destroyed.
  • Shattered acrylic on the coffee table. This was a hand-made coffee table of my friend's, and the acrylic on the top of it, where the middle of the wall (the section that collapsed), landed from the bookcase. There was also a piece of moulding that was damaged, but I think a little paint will fix that up.
  • Scratches in the bottom piece of acrylic. These are relatively minor and won't be repaired at all.
  • Destroyed self-esteem, nerves, and well-being. I have quite a bit of work to do to remake the top piece of acrylic, with upwards of 12' of velcro to cut (and then into 3 1/4" strips after that). Hopefully, I can get some help with that on Thursday evening. For now, I just need to sleep on it and calm my nerves. I'm still a bit shaken up by it, now 2 hours later.
All is not lost, and things could have definitely been much, much worse. If we had hung the wall where we initially intended to, it would have falled about 6' straight down to the ground, probably destroying or severely damaging the power supply and/or processor, not to mention the shell itself.
I was actually somewhat surprised that the wall continued to function after the physical impact. Static electricity wreaks havoc on it, and even taking off the acrylic ("unzipping" the velcro) has caused the processor to freeze from time to time.

... I am the center of calm... I am the center of calm... I am the center of calm...

Labels:

Friday, November 10, 2006

Progress Update & Videos

General

A friendly reminder that the Level_13: Bonus Round art show is opening on Friday, November 17th at 6pm! As always, there is no admission, and refreshments are provided.

Assembly

I finished mounting the switch for controlling the pseudo-random seed, on the same section as the power plug. The switch has a slightly unsmooth feel to it, but what can you expect from a $0.50 RadioShack switch?
I also removed some of the felt from the wall on the bottom half and replaced it with velcro. The bottom piece of acrylic wasn't holding up very well, so I needed some more sticking power on it. I'll probably do some more, but what I changed seems to have helped immensely.

Coding

I've made huge strides in the coding since the Sunday videos.
Things I've added:
  • 2 new still images
    1. strawberry
    2. ghost (4 color variations)
  • 2 multi-frame images
    1. Fireball is a 4-frame animation
    2. goomba is a simple 2-frame animation
  • 2 new emitters
    1. emitter_single - colors the given pixel according to a palette index value
    2. emitter_random - turns on/off (19/81% probability) a number of pixels
  • 4 new transforms
    1. triple spiral
    2. multiple spiral
    3. starburst
    4. zigzag
The new transforms all use a basic encoding scheme, so adding new ones is a relatively simple process. It's pretty simplistic and only allows me to encode 4 different actions per pixel:
  1. keep the same value
  2. get left neighbor's value
  3. get right neighbor's value
  4. get top/bottom neighbor's value
The transform map for this only takes up 30 bytes of storage (4 pixels per byte), which still leaves me with plenty of storage in reserve. If needed, I could bump this up to 60 bytes and have more complex actions, such as 2- & 4- pixel averaging (basically making the "neighbor average" function a simple map). I think currently, I'm using 602 of the 1024 available external RAM of the processor.
  • 3 channels * 120 pixels * 1 byte = 360 bytes for pixel value storage
  • 120 pixels * 1 byte = 120 bytes for temporary pixel value storage (for transform functions)
  • 16 colors * 2 bytes = 32 bytes for color palette value storage
  • 120 pixels * 4 bits for index value = 60 bytes for image map storage
  • 120 pixels * 2 bits for transform mode = 30 bytes for transform map storage
  • -----------------------------------------------------------
  • 602 bytes of external RAM storage, leaving me 422 bytes left to use!

So... on to the goods...

One of my coworkers was nice enough to lend me his video camera for a couple days, so I could take some real footage of the wall in action. I've taken and encoded 2 videos. One weighs in at 2:34, and the other is 7:00 long. I've provided 2 different encoding options, .mov and .wmv.

Shorter video, 2:34
QuickTime 4.09MB
WMV 8.56MB


Longer video, 7:00
QuickTime 46.7MB
WMV 24.7MB

Labels: ,

Sunday, November 05, 2006

Eyecandy

Assembly

I got a few more switches for the fan and the pseudo-random number generator seeder, got them mounted (I still need to mount the pseudo-RNG switch somewhere), and gosome felt glued to the back side of the pegboard. This last part was an attempt to protect the boards somewhat from the outside elements. It should stop small stray debris, small amounts of liquid, and thin metal rods (e.g. screwdrivers) from coming in direct contact with any of the boards or the terminal strips.

I also bought some hanging brackets and started working on a way to secure the pegboard to the wall. Currently, I'm planning on securing (Liquid Nailz) several pieces of wood on the back side and just using velcro to secure the pegboard. Some larger pieces of wood and a few holes cut into the pegboard should be sufficient to mount the hanging brackets, in case I want to bring it up off the floor at all.

Coding

This is the real reason for the post, however.
Behold, lots of eyecandy!


4.1MB QT4.0MB QT


4.0MB QT4.0MB QT


I'm sorry about the short videos; my camera can only take up to 16 seconds at a time.

These videos show the 6 still images I've designed (from this directory), as well as the single generator I've got coded up (edge emitter). Also shown are several of the transforms in action.
For the still images, it picks between two different transforms:
  • fade
  • neighbor average
Fade works like I described in my previous posting: simply fading from the current color to either black or white (exclusively black in these videos).
Neighbor average takes the value of each pixel plus the 3 adjacent pixels, and averages them to compute the pixel's value. Over time, the whole board turns to black because there is a certain amount of information lost with each average computation that takes place.

For the edge emitter, there are two transforms that are being used at the same time:
  • fade
  • translate
Both work as I described before, and the translate always works in the direction opposite where the emitter is positioned; if it's generating pixels on the left, the translation happens to the right.

Right now, I'm using about 5.2kB of codespace. Each of the still images takes up a moderate amount of space (~600-800 bytes), so I can't have a huge amount of them. However, I'm still well under the 32kB of available space.

The bigger issue currently is speed. The neighbor average function is very expensive, mainly because I have to keep an equal-sized pixel map to calculate the new values and then copy the new pixel map over to the old one.

Labels: ,

Friday, November 03, 2006

Post-vacation Assembly

Assembly

I'm back from my vacation and have spent a little time tonight working on the wall. I've finished attaching the velcro to the acrylic/contact paper and have basically finished the routing/securing of the cabling in the backside of the wall. I have yet to mount a few of the switches (microcontroller power switch, fan power switch), and I've got to glue some felt on a few places on the pegboard (for protection of the boards), as well as gluing the A/C power receptacle.

After all of that is done, all I need to do for this module's assembly is attach some blocks on the inside to allow me to secure the pegboard, as well as provide mounting brackets for hanging it. I will probably put 4 pieces on the top (all near the very top of the wall) and 2 pieces in the bottom. There really isn't a whole lot of room in the bottom, and I will have to rearrange some of the wiring as it is to make room.
Hopefully, it won't be too much of an issue. I was only planning on using Liquid Nailz to attach it, and that should definitely hold it well enough.


'Til next time...

Labels: